You can also be interested in these:
- CPU over temperature error: Causes and fixes
- What is a sleeper PC and why should you build one
- OEM vs Custom: Which one is better?
- MSI Cubi 5 12M full review
The BIOS is that screen you see as soon as you turn on the computer and that only lasts a few seconds. Knowing how to set up your BIOS is vital to squeeze the most out of all the components of your PC and thus, its maximum performance.
It’s not always a good idea to leave the default BIOS settings, but we’re going to show you what you can change to boost the performance. These “hidden menus” are actually very easy to manage as you will find below.
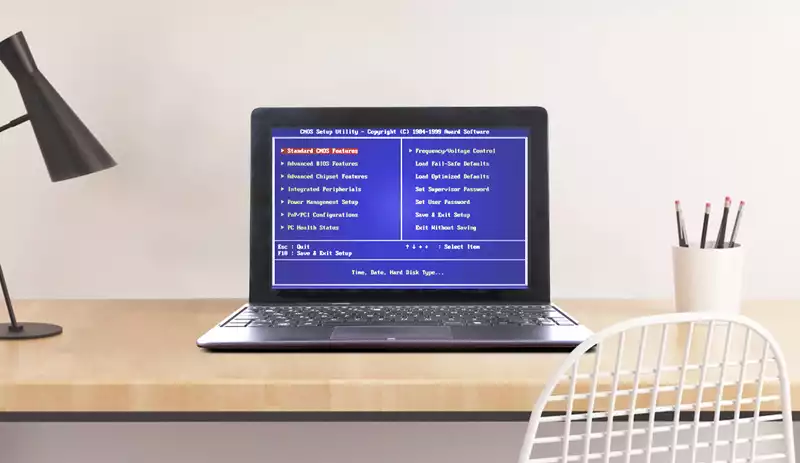
Where is the BIOS and how to access it?
The BIOS can be identified in different ways, in some PCs it is a black screen with the information regarding your hardware and in other cases it has a big logo identifying the motherboard manufacturer. Now, when you see this, you need to press one or more keys to enter the BIOS setup:
- Normally by pressing the DELETE key during this screen.
- Otherwise, press F2 or F12 on the function keys.
- You can enter some BIOS by pressing F1 or F10 on the function keys although it is not very common.
You must be attentive since the screen that shows the motherboard model changes very fast, lasting no more than 2 seconds in most cases. During this screen you must press one of those keys to enter the setup.
Setting up the BIOS step by step
The BIOS setup is easy to configure if you first take a moment to learn what options are grouped in each of the menus, some are much more intuitive than the old menus based on text labels only.
In the case of the most recent BIOS even touchscreen support is included. Let’s list the different options available in the GUI of an Asrock motherboard BIOS:
Main section
In this section you can see different parameters for your PC, such as the amount of installed RAM, available storage, fan speed, processor speed and its characteristics, system time and some other specific parameters that are useful to know.
Main menu
Unlike the main section of the BIOS, the “Main” menu shows specific characteristics of the processor, RAM, hard disks, fans and clocks, which you can configure as you wish by selecting the section you are interested in. In this menu you will also be able to configure parameters such as menu language, BIOS version and other details.
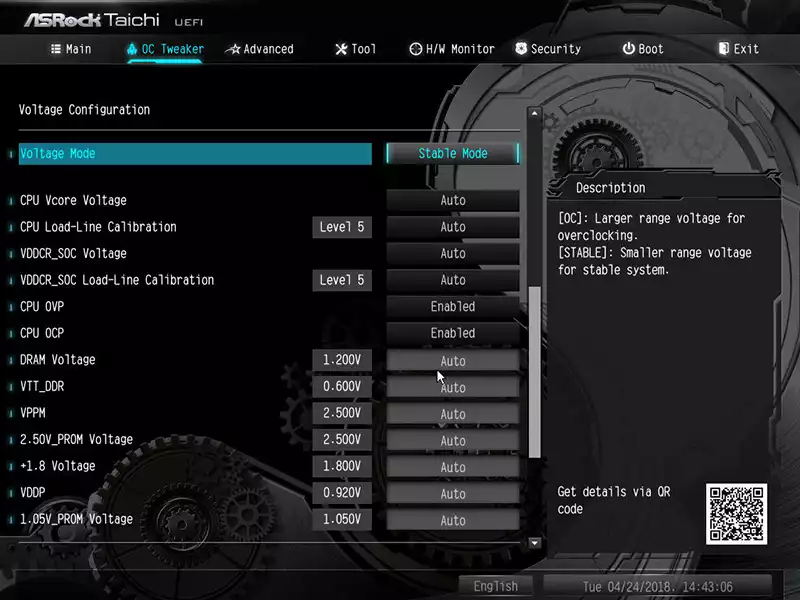
Overclocking section
Some BIOS include a section with everything you need for overclocking, in this section you can set different frequency values for RAM, CPU and integrated graphics (if any). This is the easiest way to speed up your PC components above the factory settings, but be careful, high values beyond what the hardware can handle can cause it to short-circuit or overheat excessively.
If your overclocking is not good the PC won’t turn on again, restarts after a few minutes or if it slows down when using it. For example, in the case of Asrock motherboards there is a menu called Extreme Tweaker, which includes these options:
- AI overclocker tuner: with these options you can overclock your PC automatically, manually or according to different default profiles.
- Memory frequency: you will be able to edit the RAM frequency values to obtain better performance.
- Core performance boost: Unlocks maximum performance for compatible Intel and AMD processors.
- CPU core ratio: allows you to manually modify the processor frequency.
- TPU: a slightly more advanced option than CPU Core Ratio, for overclocking experts only.
Advanced settings menu
In this section of the BIOS settings, you will be able to modify the following values:
- Enabling or disabling ports: you can choose whether to disable sensors, SATA ports, P&P options and other peripherals.
- Power on PCIe: Also called Wake On LAN, this is an option that allows the PC to wake from sleep via the network.
- Power on RTC: switch the unit on or off from sleep state according to the configured time.
- ErP: with this option the energy used by the PC when it is in sleep mode can be saved significantly. The standard establishes that if this mode is activated, the consumption of the equipment will vary between 0.5 and 1W. However, if this option is activated you will have to press the power button on the PC case to wake up the computer, since the USB ports will not work if it is in sleep mode.
Resource monitor
Do you remember the first time you looked at the BIOS and saw all those different values of your PC? In this menu you can find the same information but in a detailed and explained way. You will be able to know the frequency of the RAM, CPU, details of the hard disks, under what voltage the power supply connectors are working, the temperature of each of the components and whether or not an overclocking has been performed.
Boot
These are the system boot options, here you can choose which device the PC will use to boot. You can set to boot to a USB stick, Blu-Ray drive, a certain hard disk, a LAN network boot etc., we explain the most common options:
- Boot configuration: a small section to set boot parameters, e.g. whether to skip various checks so that the system boots quickly among other options.
- Module support compatibility mode: also known as Legacy Mode, this is a mode where you can set the boot as MBR instead of the current GPT, or in other words, disable the UEFI mode.
- Secure boot: a set of security options that when enabled will not allow the installation of custom operating systems for security reasons.
- Boot order: in this section you can set which component will boot first. If you are going to install an operating system using a USB memory stick you must select “USB”, if you’re going to use a Blu-Ray or DVD drive select “DVD-ROM” or if you want to boot from another hard disk put it as the first option in this section.
- Native NVMe support: in case your motherboard has this type of technology available and you want to use it, mark this as “enabled”.
Tools
This menu only appears in last generation BIOS of certain manufacturers. It is a menu where you can manage sensitive options such as the password to enter the BIOS, unlock CPU cores, unlock the overclocking options, among others.
Sometimes there may also be options such as booting from LAN, booting from a USB stick and updating the PC’s BIOS (which is a bit tricky).
Exit
The exit menu causes the PC to restart and perform the boot cycle again. But first, you must choose one of these options:
- Save and exit: saves all the settings you made in the current BIOS setup session. You can also press F10 to save them. If you do not save the settings using this method they will return to the default values.
- Load optimized values: with this option you will return to the default values that the BIOS had before you modified something. Very useful when something goes wrong and you don’t know what is causing the system’s instability.
- Discard changes and exit: this option allows you to exit the BIOS without saving any changes you made during the current session.
BIOS of a Lenovo motherboard
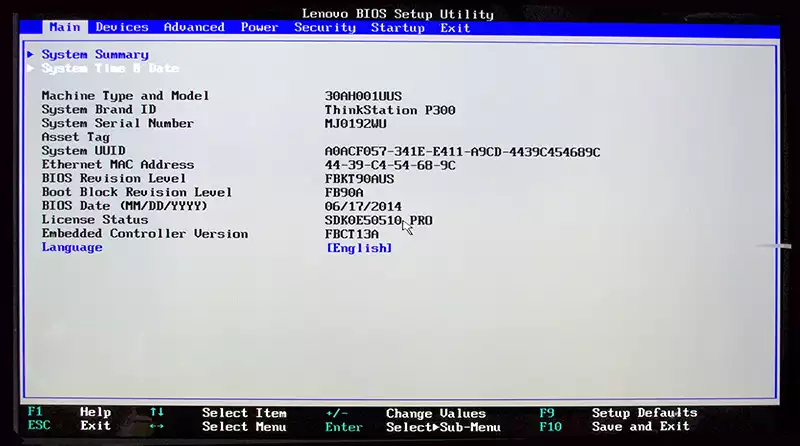
Now let’s quickly see how things change in the case of a Lenovo motherboard BIOS. In this case you won’t be able to use the mouse (as in most PCs) while in the BIOS, so you will have to use only the keyboard:
Main menu
The menu that you can see immediately after entering the BIOS, you will see a list of features of your PC. This section includes a subsection where you will be able to manage the peripherals installed on your PC, such as:
- USB Ports: enables or disables USB ports among other options.
- SATA ports: enables or disables the SATA ports among other information.
- Video: handles everything concerning the internal GPU of the PCB.
- Audio: handles everything related to the sound integrated in the PCB.
- Network: manages network devices and PC connection methods.
Advanced configurations
In this section you can manage the CPU frequency and voltage for overclocking and view its temperature values, among others.
Energy management
Also known as “Power Management”, here you can manage your computer’s energy consumption.
Security options
In this section you can find the classic PC security options, from setting a boot password, setting a password to access the BIOS or enabling “Secure Boot”, which prevents you from installing custom operating systems that may be insecure.
It also includes the TCG option, where you can configure whether or not to use the Trusted Platform Module, which is a small chip used to store passwords in the hardware so that they are totally secure.
Home
The Startup menu, as in the previous case, shows all the start-up configurations that can be programmed, you will be able to establish if you want a specific hard disk to be in charge of the system start-up or a USB memory with a Windows or Linux installer. You will also find options such as Legacy Mode, Fast Boot and others.
Exit
“Exit” is the last option of this type of BIOS and just like Asrock PCBs’ BIOS, you will be able to reset default configuration values, save changes or set “optimal values” according to usage profiles (only in some cases).
Conclusions on BIOS configuration
If you are a computer connoisseur, configuring the BIOS can be an excellent idea to exploit the full potential of your PC, install a new operating system or activate secure booting. In any case, don’t change anything you don’t know what it is – get yourself informed first!
More stories like this
- CPU over temperature error: Causes and fixes
- What is a sleeper PC and why should you build one
- OEM vs Custom: Which one is better?
- MSI Cubi 5 12M full review
- How to remove the metadata from image files
- Is your new laptop second hand? Let’s find out